Paint, Paper, & Popcorn: An Art Themed Summer Fun Camp!

Today I thought I’d share some of the fun art activities that we’ve completed over the past 2 weeks. Some activities tie to specific pieces of children’s literature, some tie directly to specific artists, while others are just plain FUN! And yes, I know these were completed during a summer camp – but I’m a firm believer that teachers should build art into instruction (once a week during specials for most children is simply not enough to cultivate an appreciation and understanding for art). These ideas could also be fun for your own children over summer break.
First up was our introduction to pointillism and Georges Seurat.

We looked at some art books from the library that featured work from Georges Seurat then watched a quick video clip about him. Let me introduce you to Art with Mati and Dada! These videos are short, about 7 minutes, and make learning about artists accessible to even the youngest kiddos!
After learning about pointillism, it was time for the kiddos to try their hands at this style of art! We used q-tips and tempura paint to create our own masterpieces. I think they came out absolutely adorable. This one just stole my heart!

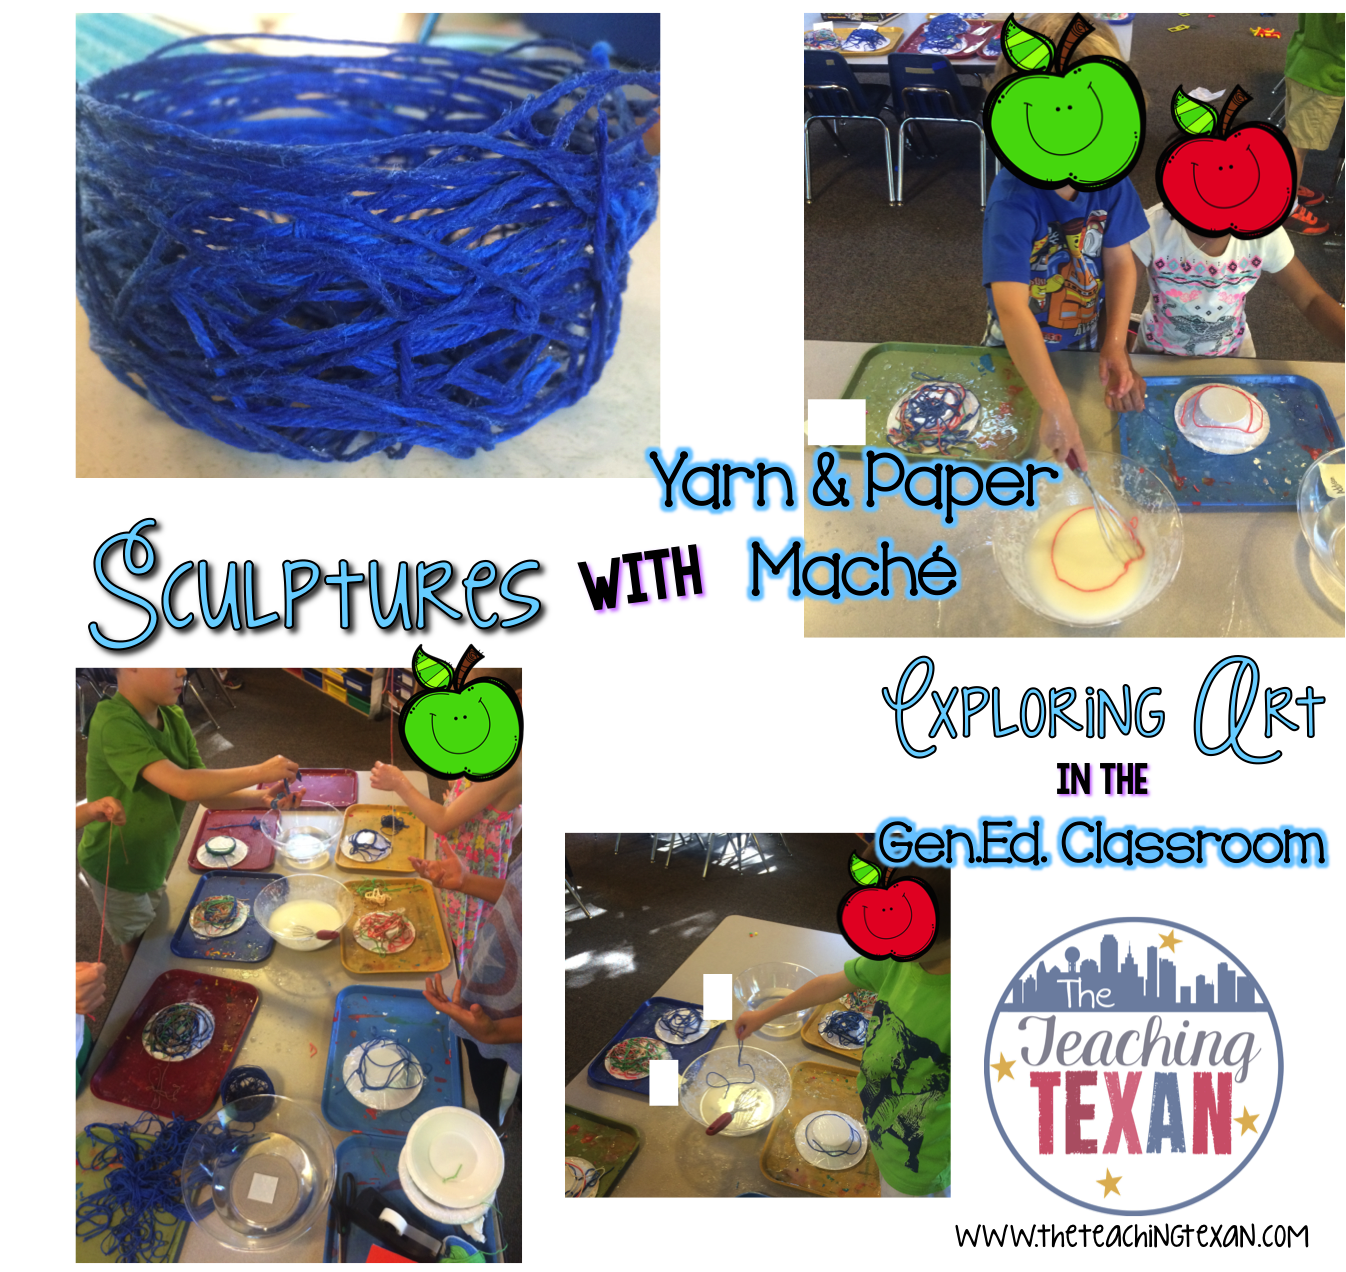
Next on our plans for exploring art was to create bowls using paper maché mix. I wanted to try something a little more exciting for the kiddos than paper, so we used yarn!

With all of our focus on art, the kiddos were hungry to learn about a new artist. They were also just plain hungry! We needed edible art!

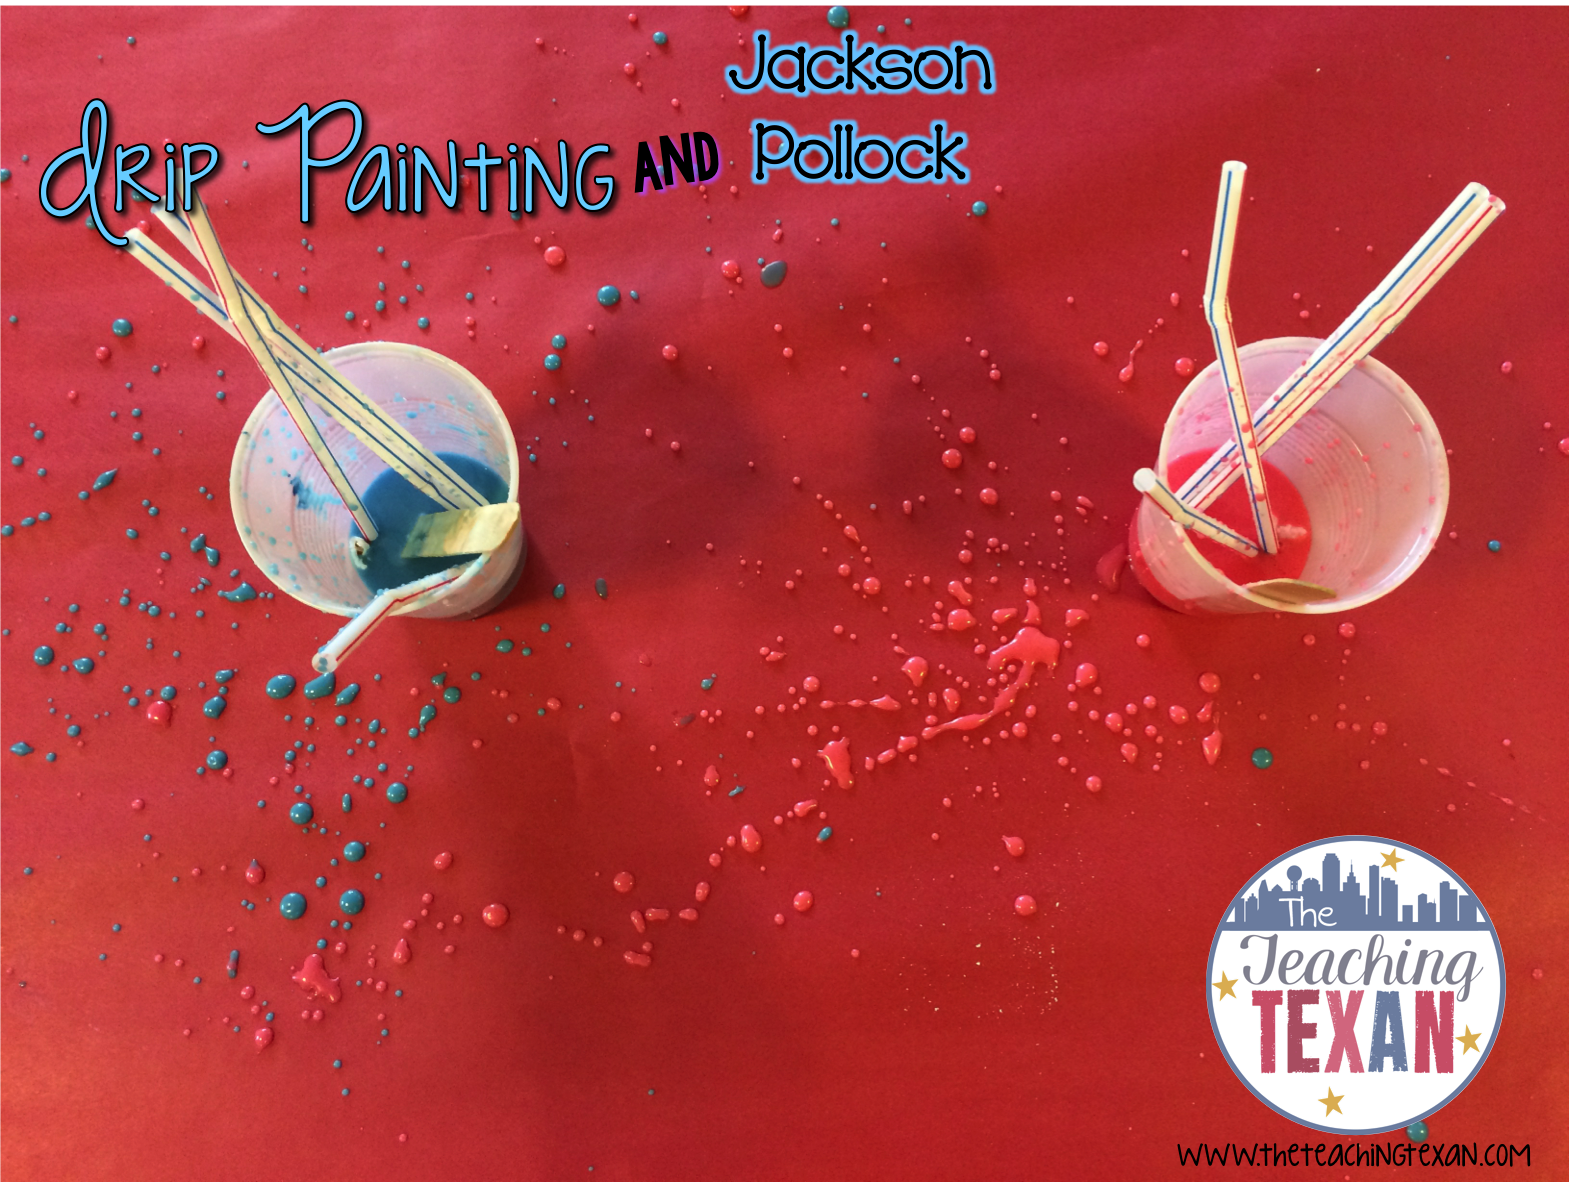
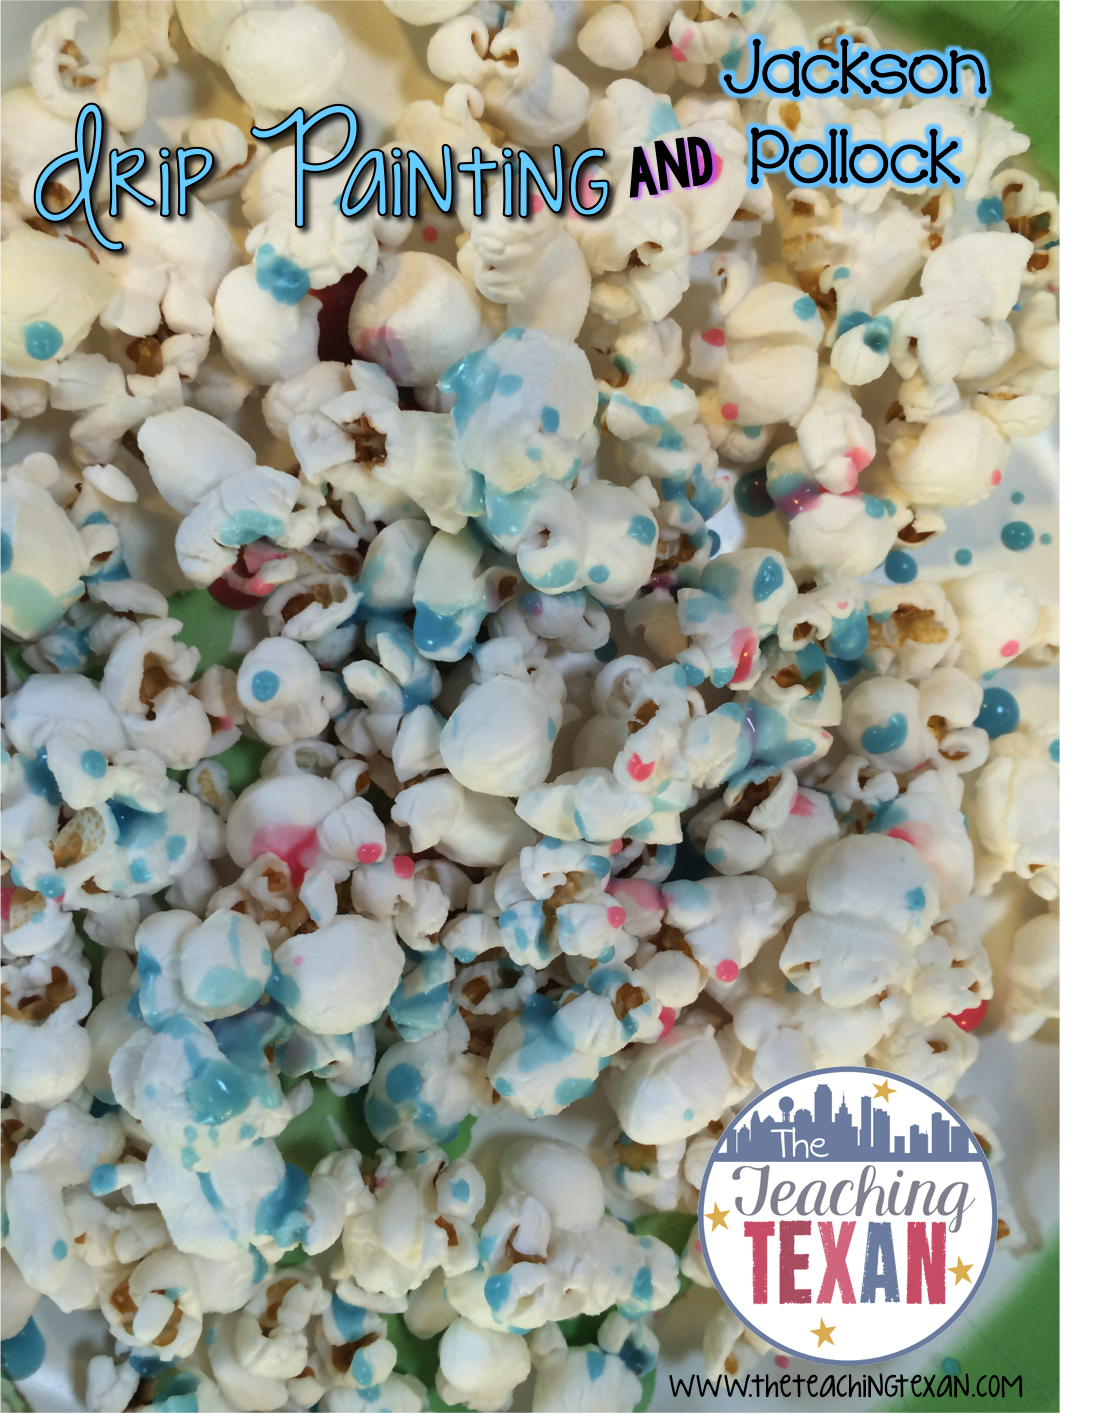
Jackson Pollock is known for his drip style of painting. I thought it would be fun to have the kiddos try their hand at drip painting using icing and popcorn! To make the icing, use powdered sugar and add water until you get a smooth consistency (a little more on the liquid side makes the drip painting easier). We used 4 cups of powdered sugar and probably 1/2 cup of water and that was more than enough for 20 kiddos!

Wayne Thiebaud is an artist most commonly known for paintings of common objects, including food! We looked through an art book to see some examples of Wayne’s work. Then, we got our hands dirty with puffy paint!
To make puffy paint, mix equal parts white glue and shaving cream. I let the kiddos add drops of food coloring to create whatever color they’d like. This was a nice departure from your typical “painting” by adding in some texture and a 3-D aspect. FYI these took a couple of days to completely dry.


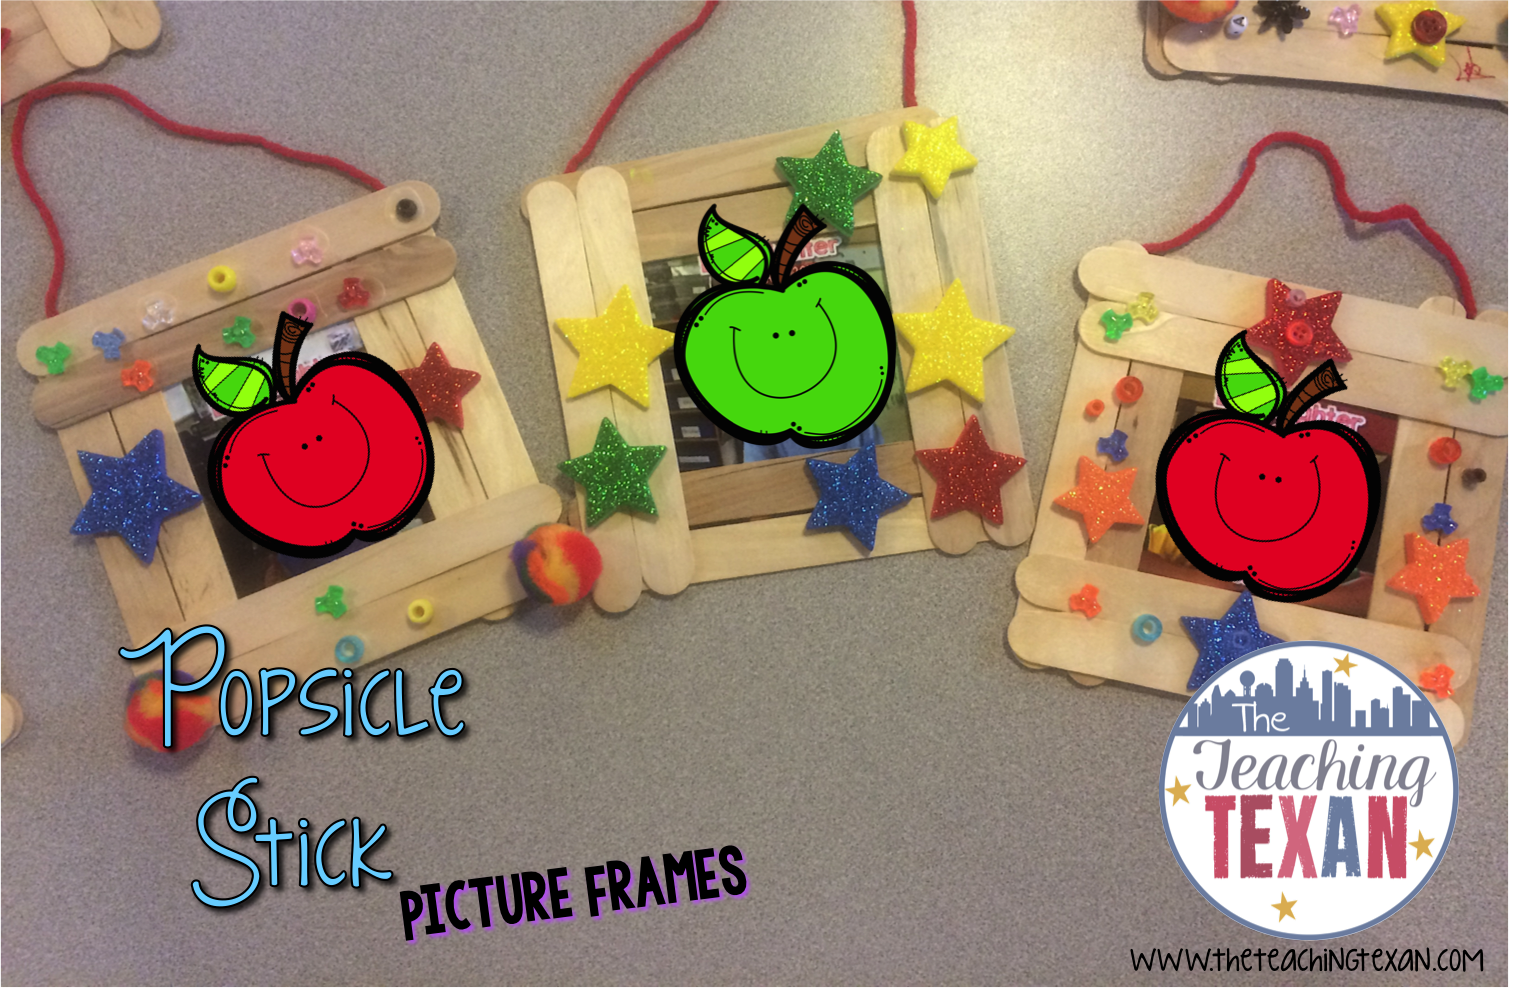
To wrap up our fun 2 weeks of art, the kids made picture frames out of popsicle sticks. I know, not the most creative thing in the world – but it was something new for them and you can’t go wrong with a classic!

To make these, use 8 popsicle sticks and white glue. I had a variety of decorations for the kids to add – stickers, beads, pom poms, markers, etc.
Before I printed the pictures I added each kid’s name and Fun Camp 2015. Who knew that you could still have pictures printed at Walgreens?? I haven’t printed pictures in years!
These are a super cute gift for the kiddos to take home to their parents.
I hope these ideas will helpful for you during the school year, or even over the summer with your own kiddos!
